Hello World, WM8505!
My first step in learning the ARM9 platform.
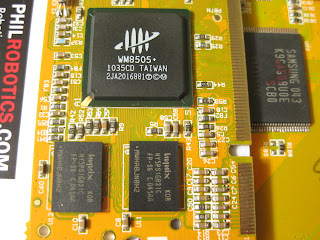
VIA / WonderMedia's WM8505 (ARM926EJ-S):
UART0 Connection:

Serial console connection details: Project Gus
Required Tools: all are free =)
The goal is to run this simple code: (main.c)
It should output these strings on UART_0 port, just like this:

After setting up the tools, here are the next steps:
-Create new project on Eclipse

-Select target processor (WM8505 is a ARM926EJ-S processor)

-Select binary format for the flash image:

-linker setting:

- after building the project, open the generated *.map file to verify the linker output

- Complete Eclipse project files:
download here: ARM9_WM8505_UART0.zip
* most of the hardware initializations (e.g. clock settings) are already done by the bootloader,
so we don't have to worry about them for now.
Next question is, "how to load and run the code?
I've tested two ways of how to transfer the generated image to the RAM:
First is through tftp transfer, second is SD card load during boot-up.
Both method uses the bootloader, which is already present in the board (in the SPI flash).
My board got v1.1.4 of U-BOOT.
1. TFTP transfer to RAM.
- get a copy of this freeTFTPD32 server application.
- using the LAN adapter, connect board to host PC Ethernet
enter u-boot console, and type these commands:

* RAM load address can use other than 0x0
2. SD card scriptcmd
-guide: How to edit "scriptcmd"
-during boot-up, the u-boot will read the "scriptcmd" script in the "script" folder of the SD card.
*these commands can also be typed in the uboot console. ("mmcinit" must be sent first)
references:
Wondermedia GPL sources
WM8505 datasheets
forum link:
Let's learn ARM using cheap 7" tablets


VIA / WonderMedia's WM8505 (ARM926EJ-S):

UART0 Connection:

Serial console connection details: Project Gus
Required Tools: all are free =)
- GNU Toolchain for ARM Processors
Sourcery G++ Lite Edition
- Eclipse IDE for C/C++ Developers
Helios SR2
- Eclipse CDT (C/C++ Development Tooling)
CDT 7 for Eclipse Helios
- GNU ARM Eclipse Plug-in
Plug-in_Installation
The goal is to run this simple code: (main.c)
It should output these strings on UART_0 port, just like this:

After setting up the tools, here are the next steps:
-Create new project on Eclipse

-Select target processor (WM8505 is a ARM926EJ-S processor)

-Select binary format for the flash image:

-linker setting:

- after building the project, open the generated *.map file to verify the linker output

- *I don't know, yet, what's with this 0x03F80000 address.
This is the load address used by Wondermedia version of U-BOOT
- Complete Eclipse project files:
download here: ARM9_WM8505_UART0.zip

* most of the hardware initializations (e.g. clock settings) are already done by the bootloader,
so we don't have to worry about them for now.
Next question is, "how to load and run the code?
I've tested two ways of how to transfer the generated image to the RAM:
First is through tftp transfer, second is SD card load during boot-up.
Both method uses the bootloader, which is already present in the board (in the SPI flash).
My board got v1.1.4 of U-BOOT.
1. TFTP transfer to RAM.
- get a copy of this freeTFTPD32 server application.
- using the LAN adapter, connect board to host PC Ethernet
enter u-boot console, and type these commands:

* RAM load address can use other than 0x0
2. SD card scriptcmd
-guide: How to edit "scriptcmd"
-during boot-up, the u-boot will read the "scriptcmd" script in the "script" folder of the SD card.
*these commands can also be typed in the uboot console. ("mmcinit" must be sent first)
references:
Wondermedia GPL sources
WM8505 datasheets
forum link:
Let's learn ARM using cheap 7" tablets


